
This guide will show you how to configure your Necesse server through the Citadel Servers Game Panel.
You’ll learn how to modify key server settings such as ports, player slots, passwords, and server name.
Looking for a Necesse game server? Click here to order your server!
Step 1: Open Configuration Files
In your Game Panel, go to the sidebar and click Configuration Files.
You’ll see a list of editable files, including server.cfg and worldSettings.cfg.

Step 2: Edit the Server Configuration
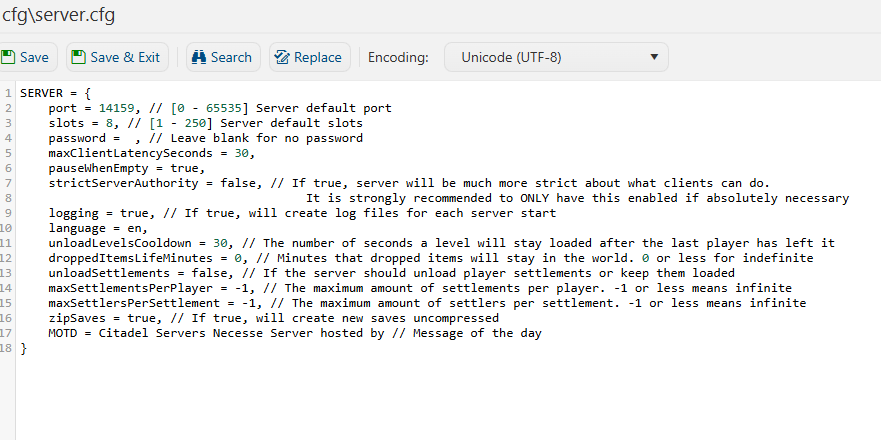
Next to server.cfg, click the Text Editor option.
You’ll see a configuration layout similar to the example below:
Step 3: Change Your Server Password
To secure your server, you can set a custom password:
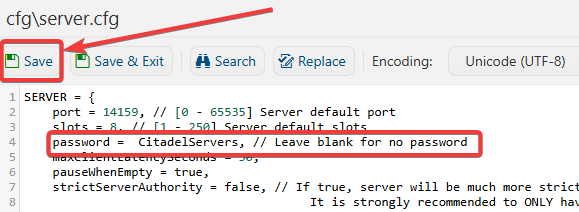
Locate the line that says:
password = test, // Leave blank for no password
Replace “test” with your desired password, for example:
password = CitadelServers,
Click Save.
Restart your server from the main Game Panel.
Step 4: Change Your Server Name and World Name
You can set a custom Server Name to easily identify your world on the server.
Go back to the Configuration Files section in your Game Panel.
Click Config Editor next to server.cfg.
You can also change the World Name of your server here.
For example, to change the world and server name:
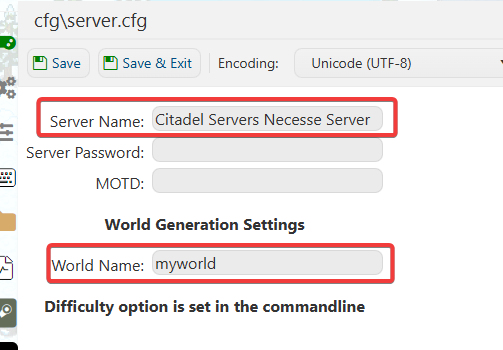
Click Save, then restart your server to apply the change.
Step 5: Edit Other World Settings
To modify gameplay settings like difficulty, PvP, or raid frequency:
In the same worldSettings.cfg file, locate the following options:
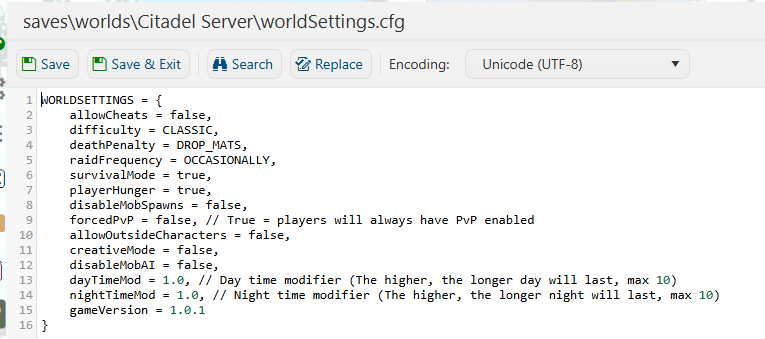
Adjust the values as desired.
Save the file and restart your server to apply changes.
For more advanced customization, see our detailed tutorials:
How to Add Mods to your Necesse Server
How to Manage Admin Permissions
How to Upload and Load your Save File on your Necesse Server
Did the above information not work for you? Please click here to contact our support via a ticket.
