How to Host a Windrose Server – Step-by-Step Guide for Survivors
If you want full control over your Windrose experience, hosting your own server is the best way to do it. You can customize gameplay, invite your friends, and create your own persistent world to explore together.
This guide explains how to host your own Windrose server and why Citadel Servers is a great choice for getting started.
Step 1: Pick a Reliable Hosting Provider
Windrose is a multiplayer survival experience where performance and stability are important, especially with multiple players exploring and building at the same time.
When choosing a host, look for:
Performance: Strong CPUs and fast SSD or NVMe storage help ensure smooth gameplay and fast world loading.
Network Quality: Low latency and stable connections are key for a seamless multiplayer experience.
Ease of Management: A simple control panel allows you to manage your server without complicated setup.
Support Availability: 24/7 support ensures help is available whenever issues come up.
Citadel Servers provides all of these, making it a solid option for hosting Windrose servers with reliable performance and easy management tools.
Step 2: Order Your Hosting Plan
Once you’ve decided to host with Citadel Servers, getting started is simple:
1. Go to the Windrose hosting page.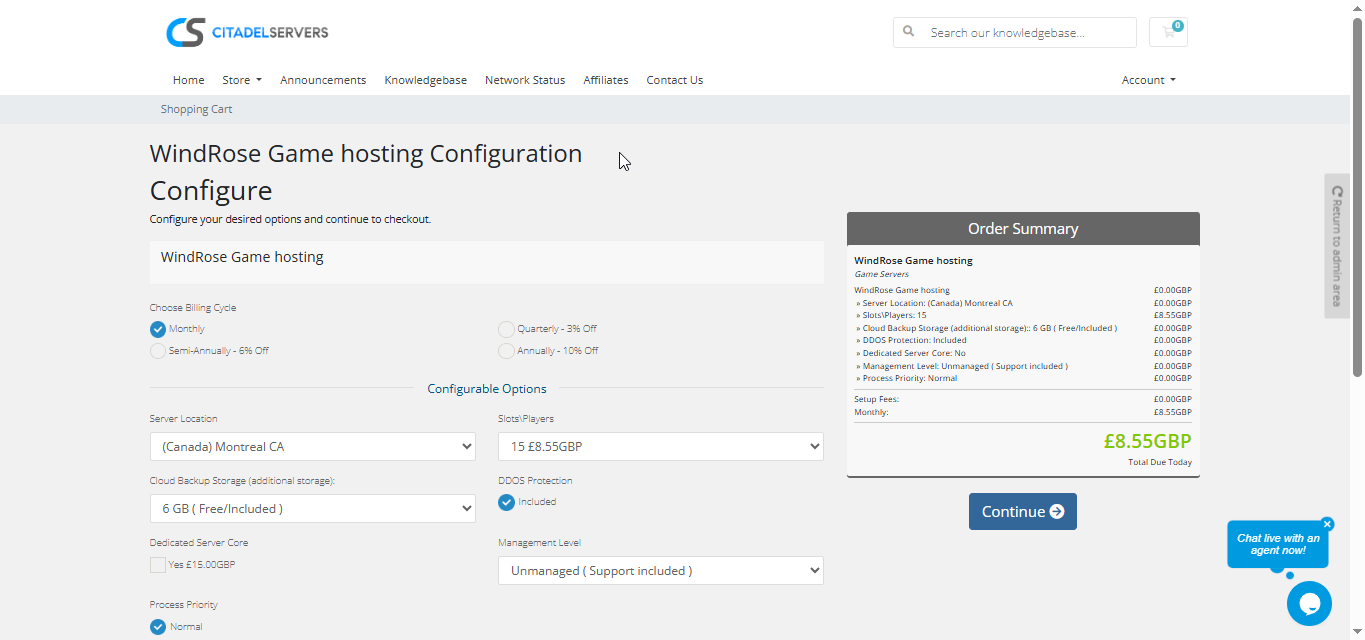
2. Choose how many player slots you want.
3. Pick your server location closest to your player base for the best ping.
4. Select any extras, like process priority, premium support, etc.
5. Proceed to checkout, once payment is confirmed, your server deploys automatically.
You’ll receive an email with your control panel login details and connection info within minutes.
Step 3: Configure Your Server
After your server is deployed, you can start customizing it:
- Log in to your Game Panel
- Set your server name, password, and permissions.
- Adjust gameplay settings based on your preferred experience.
- Upload mods or custom files if supported, using FTP/SFTP access.
- Manage server settings and performance options directly from the panel.
Everything is handled through the Citadel control panel, designed to be user-friendly for both beginners and experienced server owners.
Step 4: Launch and Play
Once everything is set up, start your server and invite your friends to join.
Players can connect using the in-game server browser or by entering your server’s IP and port.
You can monitor your server, manage players, and restart or update it anytime through the web-based control panel.
Why Host with Citadel Servers
Hosting your Windrose server with Citadel Servers gives you the reliability and control needed for a smooth multiplayer experience. Whether you’re playing casually with friends or building a larger community, you’ll have the tools to manage it.
What Makes Us Stand Out
Instant Setup: Your server is ready within minutes after payment.
High-Performance Hardware: Dedicated CPU resources and NVMe SSD storage provide smooth and stable gameplay.
Global Data Centers: Multiple server locations help ensure low latency for all players.
Full Access & Customization: You have complete control over your server files and settings.
Mod Support: Easily install and manage mods or custom content when supported.
Automated Backups & Easy Restarts: Keep your progress safe and manage your server effortlessly.
24/7 Expert Support: Our team is always available to assist with any issues.
Your Windrose server should be stable, customizable, and easy to manage and that’s exactly what Citadel Servers delivers: performance, flexibility, and reliability for your multiplayer adventure.
Order your Windrose Server now