This guide will show you how to switch your 7 Days to Die server to the experimental version.
1. Log in to your Game Control Panel.
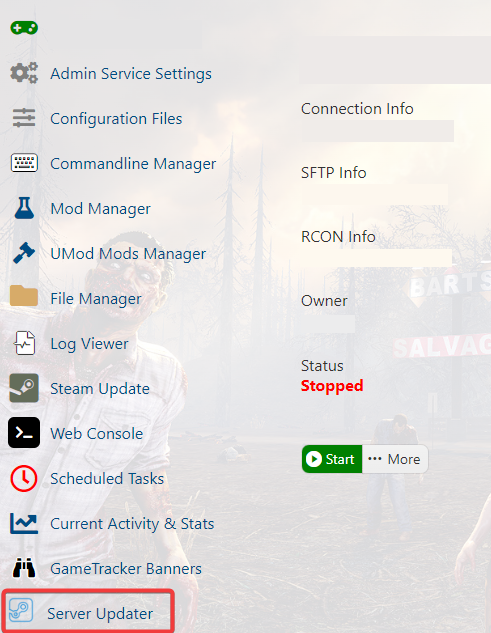
2. Locate and click Server Updater.

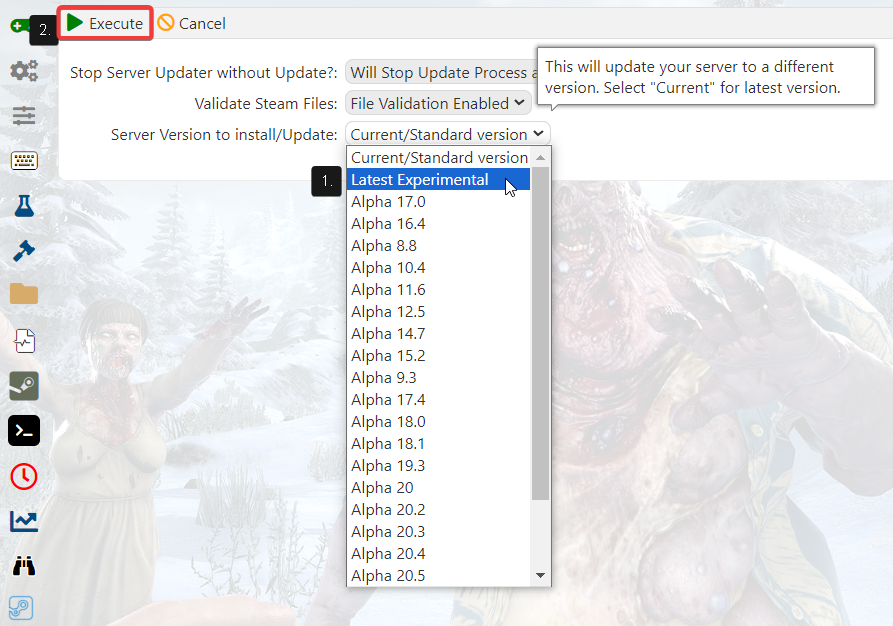
3. Select the Latest Experimental or your preferred version, then click Execute.

Note:
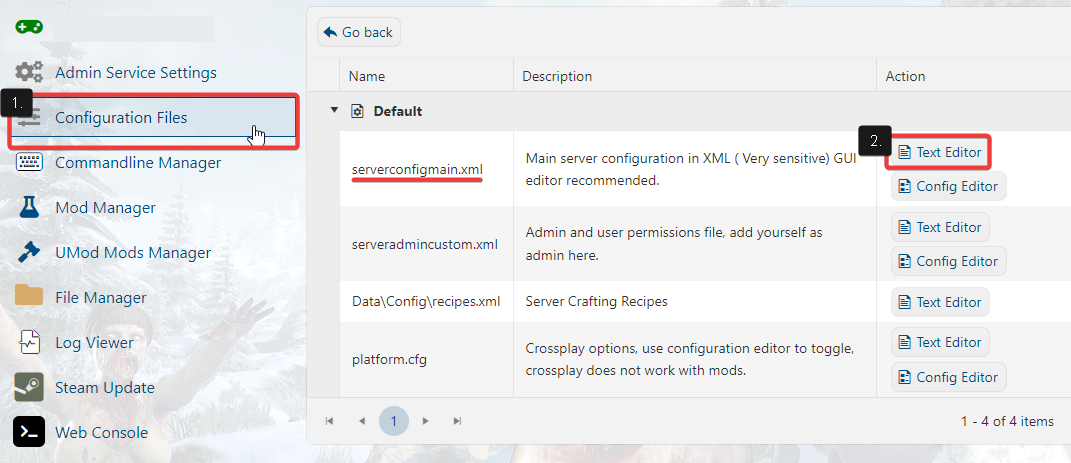
Upon switching, you'll also need to make changes to your serverconfigmain.xml (via Configuration Editor).

“EnemySpawnMode” serverconfig setting is now true/false
“EnemySenseMemory” serverconfig setting has been removed
Added “BloodMoonEnemyCount” setting (Adjust this to get more enemies per player on blood-moons if your game stage is high enough. Game-stages are still determined by your party)
Added “BedrollDeadZoneSize” setting (This is a 3 dimensional unit in meters from bedrolls that blocks zombie spawning. Including zombies spawned from biomes, screamer hordes, blood moon hordes and even sleeper volumes that are within this distance.)
Allow overriding serverconfig settings via the command line (“-settingname=value”)
Added “HideCommandExecutionLog” to disable printing of command execution to the server log
Limit of per player uncovered map area configurable with preference “MaxUncoveredMapChunksPerPlayer”, client side defaults to 4 times the area of before A16 (128 km² instead of 32 km²)
Support reserved slots (“ServerReservedSlots” and “ServerReservedSlotsPermission” settings) as well as admins joining the server even if already full (“ServerAdminSlots” and “ServerAdminSlotsPermission” settings)
Did the above information not work for you?
Please click here to contact our support via a ticket.


