This guide will show you how to setup Caves on your Don't Starve Together server.
Not a client yet? Order a Don't Starve Together server today with Citadel Servers
There are two versions of caves:
- a "Caves Only" Server instead of the forest/overworld which only requires one server,
- and a "Multi-Level" Server where you will need to rent two servers from us, one acting as the Master server (aka forest/overworld) and one as the Slave server (aka caves).
NOTE: You will need to stop your server before making any of these changes.
Setting up a "Caves Only" server:
1. For a Caves Only server, you'll need to generate the caves world. Start by logging in to your Game Panel (click this link for easy access) and navigating to your Don't Starve Together server. Make sure your server is not running by pressing the Stop button.

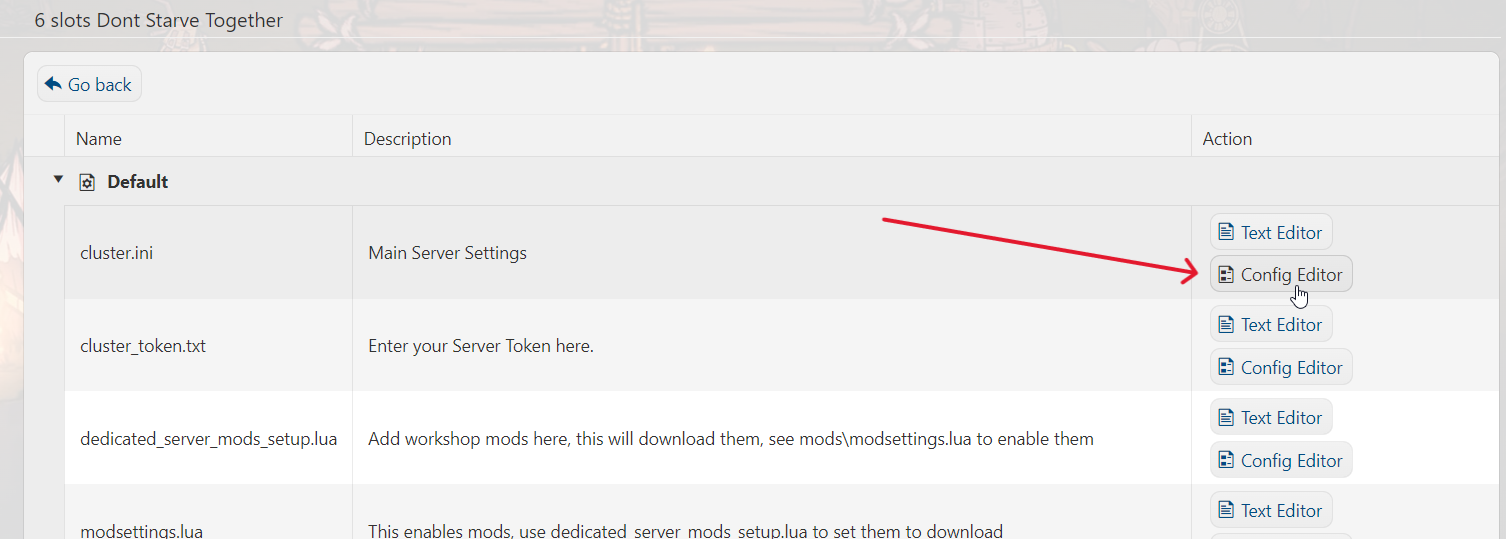
2. Go to the Configuration Files section on the left hand side panel.

3.Scroll down and look for the ServiceSettings.cfg and click on the Text Editor button beside it.

4. Take note of the Shard Master Port as we will be using this shortly. Close this window after you've noted the port number.

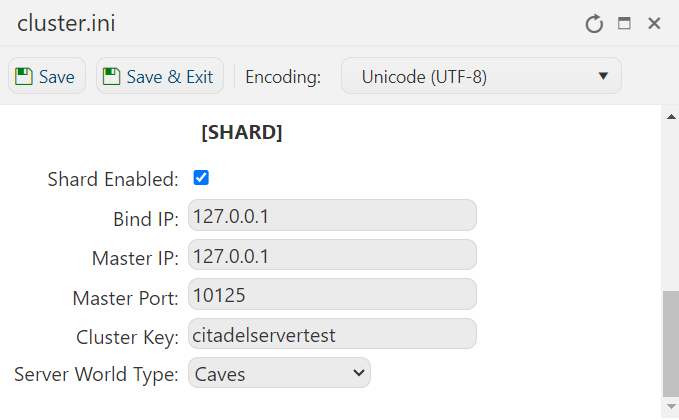
5. Next, click on the Config Editor button beside the cluster.ini file.
6. Scroll down to the [SHARD] section and refer to the settings below and modify them accordingly.
- shard_enabled = true
- bind_ip = 127.0.0.1 (NOTE: This should always be "127.0.0.1")
- master_ip = 127.0.0.1 (NOTE: This should always be "127.0.0.1")
- master_port = Server's Master Port (NOTE: Input the server's master port in that we copied earlier from ServiceSettings.cfg)
- cluster_key = thisshouldmatchallshardservers
- server type = Caves
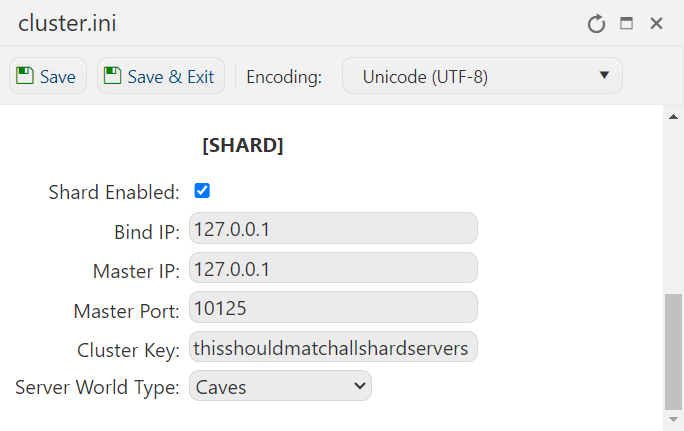
Click on Save & Exit to apply changes.
7. After that, click on the Text Editor button beside the server.ini files. There are currently two server.ini files which you will both edit.

8. You'll want to make sure that the parameter 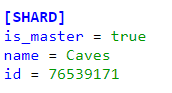

is_master = true is present in both files. Press Save & Exit for both server.ini's.9. Head back to your Game Panel (click this link for easy access) and Start your server.
10. You'll then want to connect to your server as admin and regenerate the world by typing "c_regenerateworld()" in the console, or through the "Web Console" in the control panel.
Setting up a "Multi-Level Server" (Clustering):
To set up a multi-level server, you'll need to run two Don't Starve Together servers. One for the Forest/Overworld (this will be your Master server) and one for the Caves (this will be your Slave server). Players can migrate back and forth between these servers to use the Caves.
Note: Make sure that both servers' tokens are set. Click here for the guide if you're not sure how.
1. Make sure both servers are not running by pressing the Stop button. Log in to your Game Panel (click this link for easy access) and navigate to your Don't Starve Together servers. Keep both tabs open for both servers for easy access.
2. On your Master server, go to the Configuration Files section on the left hand side panel.
3.Scroll down and look for the ServiceSettings.cfg and click on the Text Editor button beside it.
4. Take note of the Shard Master Port as we will be using this for both servers. Close this window after you've noted the port number.
5. Next, click on the Config Editor button beside the cluster.ini file for both servers.
6. Scroll down to the [SHARD] section and refer to the settings below and modify them accordingly.
Note: The Master Port for both configs should be the same, which is the Master Port of our Master Server.
The Master server should look like this:

The Slave server should look like this:
Click on Save & Exit to apply changes.
7. After that, click on the Text Editor button beside the server.ini files. Since there are two server.ini files per server, you will need to edit four server.ini files in total.
8. For your Master server, you'll want to make sure that the parameter
is_master = true is present in both files. Press Save & Exit for both server.ini's.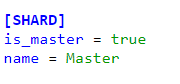
9. For your Slave server, you'll want to make sure that the parameter
is_master = false is present instead. Press Save & Exit for both server.ini's again.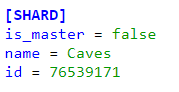
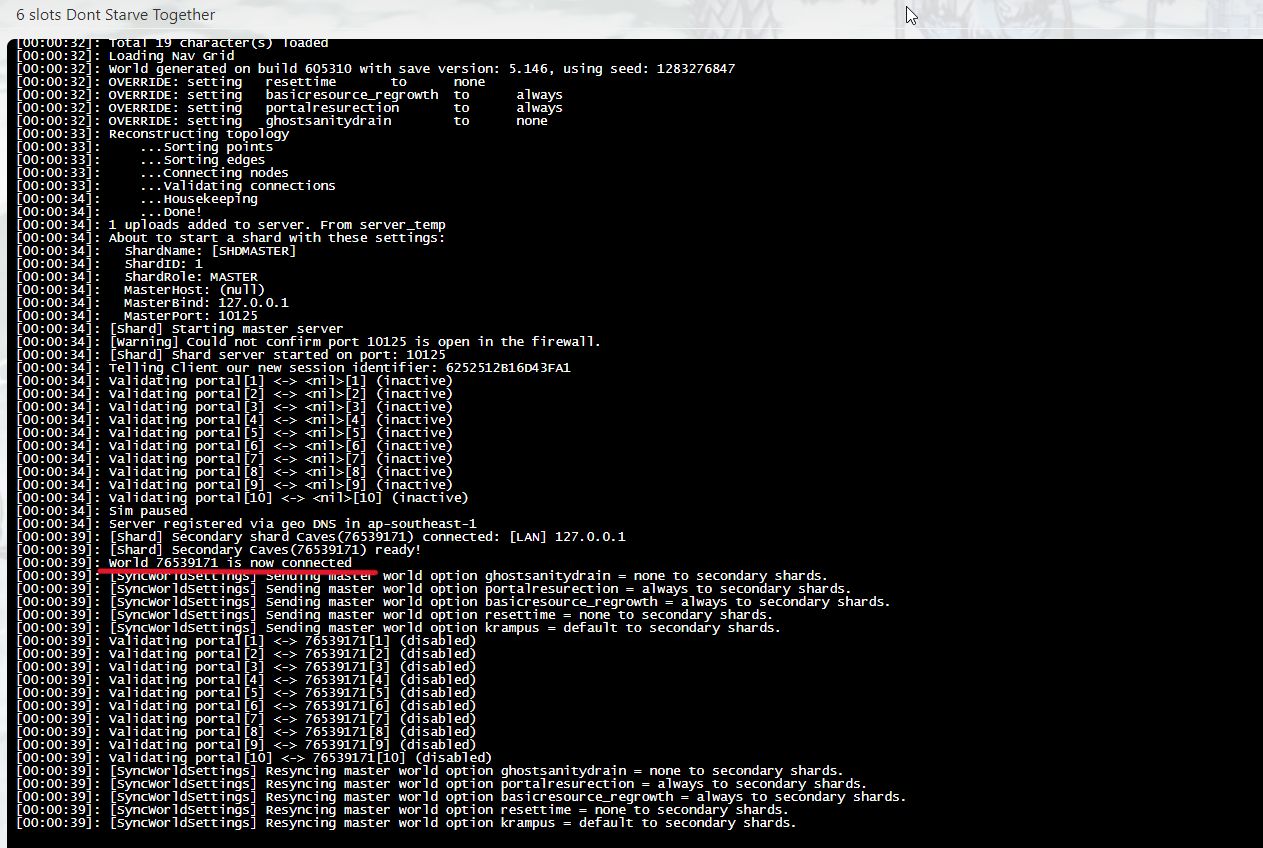
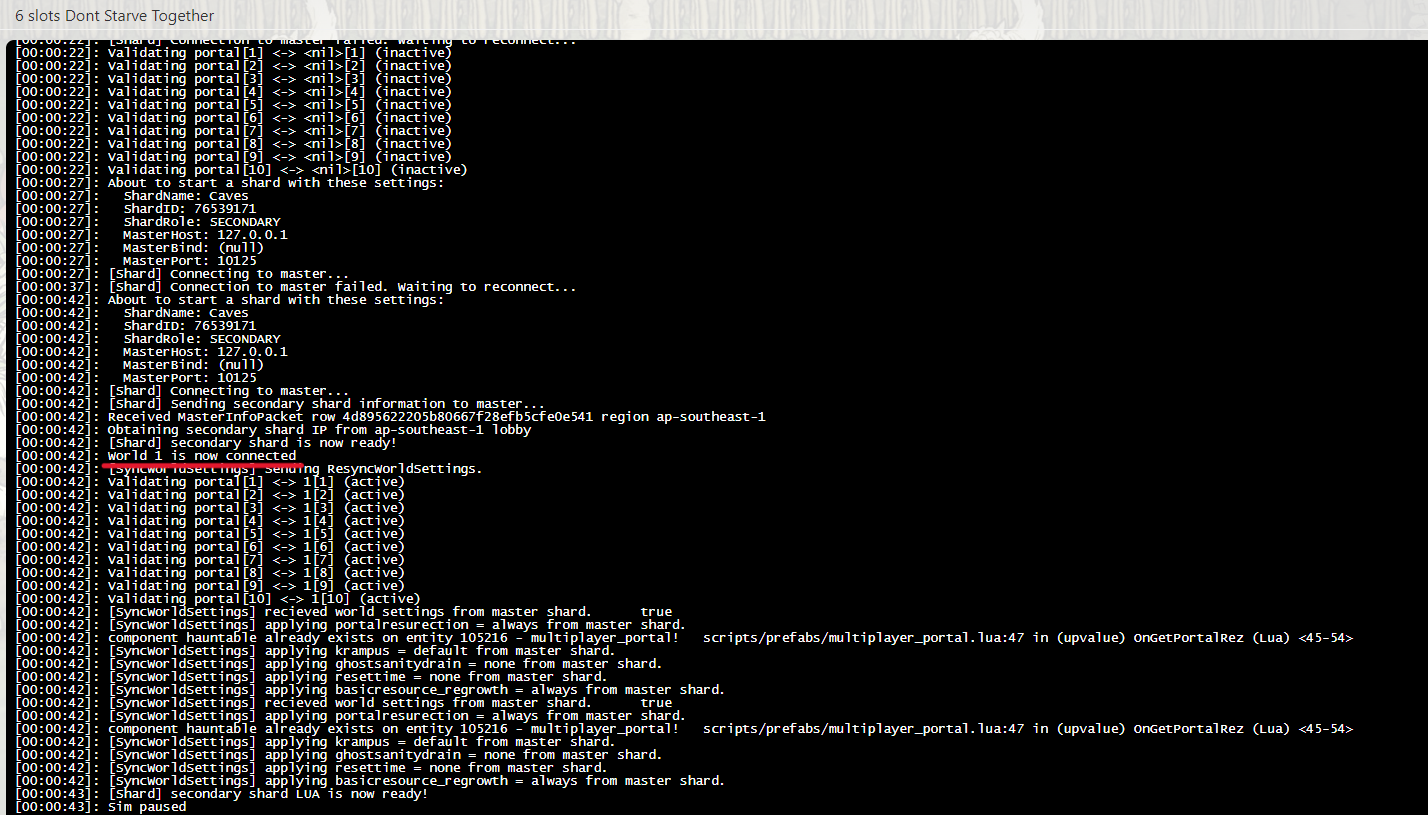
10. Start both servers by heading back to your Game Panel (click this link for easy access) and clicking the Start button. After they initialize, you should see them connect to each other in their respective logs.
11. To make sure your servers have sync'd correctly, access the server's Web Console. It will tell you if they have successfully connected, as shown below:
12. You'll have to regenerate the Master server by typing "c_regenerateworld()" into the in-game console or the "Web Console" to spawn cave entrances. Alternatively, you can use "c_spawn('cave_entrance')" instead if you really want to preserve your existing world.
Common Errors
- Different Gamemodes: Both servers need to be running the same game mode.
- Wrong Master Port: Make sure both servers are using the Master server's port.
- Wrong IP Address: Both servers should use "127.0.0.1" local IP as they should be on the same IP address.
- Not on the same dedicated server: Both servers should be on the same dedicated server. This removes any latency delays and improves connectivity. If they aren't on the same dedicated server, please contact our support.
Frequently Asked Questions (FAQ)
I cannot find my server in the server list!
There are a couple of reasons why you can't find your server in the server list, such as not going through the initial setup.
Read this guide from our knowledgebase to help you with this problem!
Did the above steps not work for you? Please contact our support and we'll help you out!
